DIY Upcycled Plastic Bottle Cap Pincushion Ring


For this little project, I re-used a small gatorade bottle cap. In my opinion it's the perfect size for a pincushion ring. The regular size gatorade bottle cap is probably perfect for a pincushion bracelet.


I referenced the tutorials below, they were super helpful. One thing I did different though, was use a leather hole punch to make the holes in the cap for the elastic. As long as the plastic isn't too thick it should do it, it did the gatorade cap.

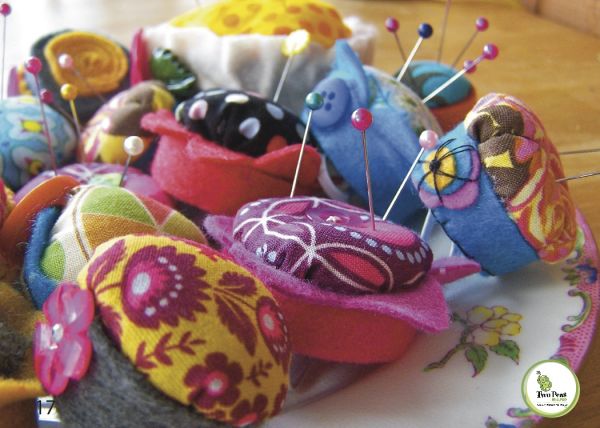
Basically all you do is take a thin elastic and run it through the holes. Make it loop and your size then knot the ends in place. I made my fabric circle 4 inches in diameter (using some leftover cotton from this previous refashion of mine). Gathered it, stuffed it and hot glued it into place. Lastly, I took a 3/4 inch cotton lace trim and wrapped it around the lid edge for embellishment.


Or maybe you don't want a ring and would rather take a candlestick holder and upcycle it into a multiple pincushions holder like this one:

Or create whole new apparatus with old silver and have space for just not pins but other sewing notions as well, like this one by Todolwen

☮♥♻

DIY Sensory Cube for Baby

 thee Inspiration:


I originally found the cubes on Pinterest but each blogger has made excellent tutorials that are easy to follow.

The cube is pretty simple by itself. Just use different textured materials (perfect upcycling project) and add on things like buttons and rings for added interest.

Here is what I came up with:


Like I captioned my reel, I made the sensory cube made with odds and ends of materials I had lying around. I think it came together nicely but definitely should’ve added interface to the squares to have them keep their shape and no topstitching because it ended up getting in the way of the final put together. It was a fun little project. You can get really creative with it. Reuse and upcycle materials you already have. Add things that will make noise and personalize it for your little one with their name.


☮♥♻

Bubble Theme Birthday Party Signage - Thanks for Popping By!

  Here I'm just sharing some printable/cuttable images I made for my son's bubble themed birthday party.

First up is a bubble station sign that I used my Silhouette cutting machine with. Vinyl on wood (Unfinished Wood Arch Shape). 


This was the Bubble Station sign up close right away I was done putting it together. I painted the wood panel with an Ombre effect to match the piñata I made and used a glossy iridescent vinyl.

Terribly zoomed in pic, sorry. Anyway here it was in action. Surrounded by various different bubble wands and tools. The bottom group of bubbles on the sign were the inverse/leftover cut outs of the top bubbles. I didn't want to waste the vinyl and it worked.


Next are thank you labels. The bubble buddy I didn't end up using but I thought it would have been funny and totally on theme.


This image of "Thanks for making this birthday POP" I did use. Again cutting machine and vinyl in an iridescent frame from the Dollar Tree. This thank you note was placed by the party favors on the gift table.

Party favors consisted of bubbles (of course), shiny bubble stickers, pop tubes and a mini pop fidget keychain. The iridescent treat bags were from Walmart.
In color for printing

In black for cutting